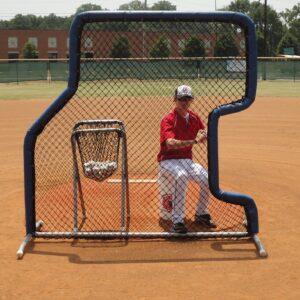
This comprehensive guide provides step-by-step instructions for installing permanent baseball backstops. Learn professional techniques for safe, durable backstop installation that meets industry standards and protects players and spectators.
_______________________________
Baseball Backstop Installation Guide: Steps for Perfect Setup
A properly installed baseball backstop is essential for player and spectator safety while defining your field’s professional appearance. At BaseballTips.com, we’ve helped countless programs install backstops that stand the test of time since 1999. This guide walks you through the entire installation process using techniques we’ve refined through decades of field experience. Remember, good and cheap don’t go together when it comes to backstops – investing in quality materials and proper installation now saves headaches and replacement costs later.
Planning Your Baseball Backstop Installation
Before breaking ground, proper planning ensures your backstop will serve your program for years to come. Most backstop failures we see stem from poor initial planning rather than material issues.
Start by determining the appropriate backstop size based on your level of play. Youth leagues typically require backstops 20-24 feet high and 40-60 feet wide, while high school and college programs need structures 30-40 feet high and 60-80 feet wide. Professional installations often exceed these dimensions.
Next, survey your installation site for underground utilities. We can’t stress this enough – call your local utility marking service before digging. We’ve seen teams face expensive repairs and delays from hitting unmarked water, gas, or electrical lines.
Consider soil conditions at your site. Sandy or loose soil requires deeper footings than clay or compact soil. If you’re unsure about your soil stability, consult with a local contractor who understands regional soil characteristics.
Gathering Materials and Equipment
Quality materials determine backstop longevity. Based on our experience working with programs nationwide, here’s what you’ll need:
For framework: Schedule 40 galvanized steel posts (3-4 inch diameter), heavy-gauge chain link fencing (9-11 gauge), tension bands, tension bars, tie wires, and cap rails. Many programs make the mistake of using lighter materials that fail within a few seasons – we only recommend materials that will last.
For footings: Ready-mix concrete (3000 PSI minimum), gravel for drainage, and forms for shaping concrete.
Equipment needed includes: Post hole digger or power auger, wheelbarrow, shovel, level, measuring tape, string line, concrete mixing tools, wire cutters, wrenches, and safety equipment including gloves and eye protection.
Setting Support Posts: The Foundation of Stability
The most critical step in backstop installation is properly setting your support posts. We’ve seen countless backstops fail because posts weren’t set deep or strong enough.
Dig holes for main support posts at least 3-4 feet deep (deeper in areas with freeze-thaw cycles) and 3 times the diameter of your posts. Space corner and line posts according to your backstop design, typically 8-10 feet apart.
Place 4-6 inches of gravel at the bottom of each hole for drainage. Position posts in holes, ensuring they’re plumb using a level. Brace posts temporarily while concrete sets.
Mix concrete according to manufacturer specifications and pour around posts. Slope the concrete slightly away from posts to prevent water pooling. Allow concrete to cure completely (typically 3-7 days) before continuing installation.
Installing Chain Link Fencing
Once your posts have set, it’s time to install the chain link fencing. Begin by attaching tension bars to the ends of your fencing sections, then secure them to corner posts using tension bands. Install cap rails across the top for additional stability.
Stretch fencing between posts using a fence stretcher tool to achieve proper tension. Inadequate tension leads to sagging and premature wear – a common mistake we see on DIY installations. Secure fencing to line posts using tie wires spaced approximately 12 inches apart.
For backstops with overhangs, install additional framework using angled pipes and secure fencing to create the protective overhang structure. This critical safety feature prevents balls from sailing into spectator areas.
Ready to Upgrade Your Field?
Don’t risk player safety or program reputation with an improperly installed backstop. If you’re ready to create a professional-quality field but need additional guidance, our team at BaseballTips.com is here to help. We offer free consultations to ensure you select the right materials and understand proper installation techniques.
Contact our field equipment specialists today at 1-800-BASEBALL or visit our backstop section at BaseballTips.com to browse our professional-grade options that stand up to years of hard use. Remember, we’re here to support your kids’ success both on and off the field.

